
Planning Your Fire Pit
Before you start building, it’s crucial to plan your fire pit carefully. Consider the following factors:
- Location: Choose a spot that is at least 10 feet away from any structures, trees, or flammable materials. Ensure the area is flat and level.
- Size and Shape: Decide on the size and shape of your fire pit. A common size is 3-4 feet in diameter for the inner circle, with an outer diameter of around 5-6 feet.
- Permits and Regulations: Check with your local authorities to ensure you comply with any regulations or permit requirements for building a fire pit.
Materials and Tools Needed
Gather the necessary materials and tools before you begin:
- Concrete mix
- Gravel
- Rebar or wire mesh
- Shovel
- Trowel
- Level
- Wheelbarrow or mixing tub
- Mold or formwork (optional)
- Fire bricks or a fire ring (optional for lining the pit)
- Water source
Step-by-Step Guide to Building a Concrete Fire Pit
Step 1: Mark and Excavate the Area
Use a string and stakes to mark the perimeter of your fire pit. Once marked, dig out the area to a depth of about 8-12 inches. Ensure the bottom of the pit is level and free of debris.
Step 2: Create a Gravel Base
Fill the bottom of the pit with 2-3 inches of gravel. This layer will help with drainage and provide a stable base for the concrete. Use a tamper or the flat side of a shovel to compact the gravel.
Step 3: Set Up the Formwork
If you are using a mold or formwork, set it up according to the desired shape and size of your fire pit. Ensure the formwork is level and securely in place. This step is optional but can help achieve a cleaner finish.
Step 4: Mix and Pour the Concrete
Mix the concrete according to the manufacturer’s instructions. For a more durable fire pit, consider adding rebar or wire mesh to the concrete mix. Pour the concrete into the formwork, filling it to the top. Use a trowel to smooth the surface and remove any air bubbles.
Step 5: Shape and Smooth the Concrete
As the concrete begins to set, use a trowel to shape and smooth the edges of the fire pit. Pay attention to the top edge, ensuring it is level and free of rough spots.
Step 6: Cure the Concrete
Allow the concrete to cure for at least 48 hours. During this time, keep the concrete moist by spraying it with water periodically. This will help prevent cracks and ensure a strong, durable fire pit.

Adding Finishing Touches
Optional: Lining the Fire Pit
For added durability and to protect the concrete from high heat, consider lining the inside of the fire pit with fire bricks or a metal fire ring. This step is optional but recommended for a longer-lasting fire pit.
Sealing the Concrete
Once the concrete is fully cured, apply a concrete sealer to protect it from the elements. This will help prevent staining and make it easier to clean.
Landscaping Around the Fire Pit
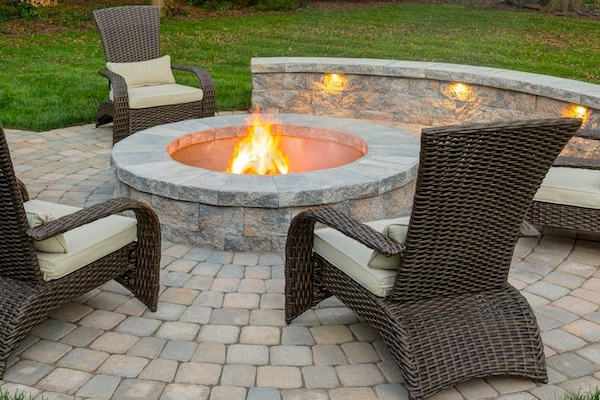
Enhance the area around your fire pit with landscaping elements such as pavers, gravel, or decorative stones. Add seating options like benches or chairs to create a comfortable and inviting space.
Safety Tips for Using Your Fire Pit
- Always have a water source or fire extinguisher nearby.
- Never leave the fire unattended.
- Use a spark screen to prevent embers from escaping.
- Only burn dry, seasoned wood to minimize smoke and sparks.
Building a concrete fire pit is a rewarding DIY project that can transform your outdoor space. With careful planning and attention to detail, you can create a durable and stylish fire pit that will provide warmth and enjoyment for years to come. Whether you’re roasting marshmallows with the kids or hosting a gathering with friends, your new fire pit will undoubtedly become the heart of your backyard.
Thank you for visiting our site. We hope you are enjoying the articles you are finding here. If you have any comments or questions, please feel free to contact us today. We also ask that you visit our sponsor Asphalt Sealcoating Greenville.